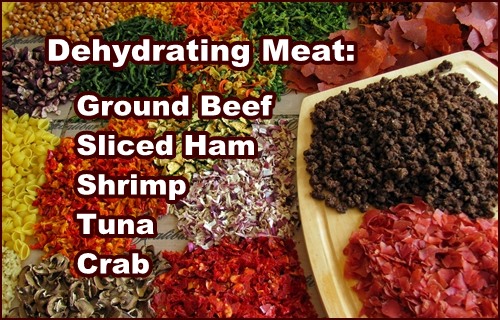
Dehydrating Meat
There are a few tricks when dehydrating meat for backpacking meals that greatly improve its tenderness when you rehydrate it on the trail.In this section I share my bread crumb technique and cover how to dehydrate ground beef and turkey, sliced ham, shrimp, tuna and imitation crab meat. I continue with how to dehydrate chicken in the next section.
How Long will Dried Meat Keep?
Freezing dried meat will preserve it for several years.
Vacuum sealing the dried meat prior to freezing prevents freezer burn and freezing stops the clock for all biological processes.
For use and storage less than a year, freezing is not required, but is still beneficial before you assemble your meals – provided you take reasonable care in drying and packing it:
- Dry only lean meats and blot off any oil during the drying process. It is the fat in meat that can turn rancid as it reacts over time with oxygen. Heat and light accelerate oxidation, so store in a cupboard away from heat.
- If storing dried meat for up to two weeks in preparation for a trip, you may store it in jars with tight fitting lids. If your trip follows shortly thereafter and is for only a few days or a week, packing the meat in zip-style bags with the other ingredients in the meals is sufficient.
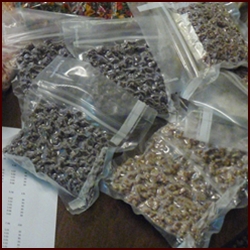
- If use of the dried meat will occur beyond a month, or if you will be hiking or paddling in hot or moist conditions, vacuum seal the meat.
If you will be dehydrating meat several weeks in advance and sending food ahead in mail drops or carrying it on a long journey, vacuum seal and freeze the dried meat until ready to assemble into meals.
Tip: When removing dried food from the freezer, allow it to return to room temperature before opening the container to avoid condensation from forming on the food.
After the meals are assembled, vacuum seal into daily rations.
Note: I have eaten meals preserved this way, which included dehydrated meat, eight months after I packaged them with no problems.
Dehydrating Meat: Ground Beef
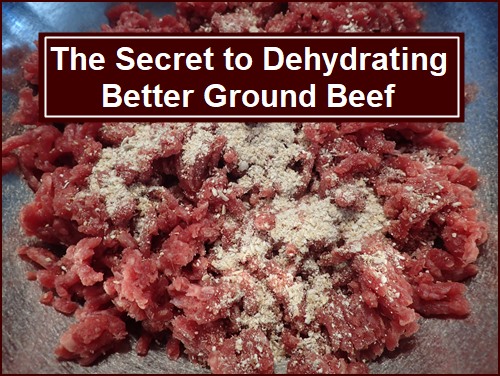
Backpackers often call dehydrated ground beef “gravel” because it doesn’t rehydrate well. Solve this problem by adding bread crumbs to the meat before cooking it. Bread crumbs allow more liquid to penetrate the dried meat when you rehydrate it, so it turns out tender every time.
Use only lean or extra lean ground beef with fat content in the 7% to 15% range. Ground beef with 15% fat content is often labeled as Ground Round. Ground beef labeled as Chuck or Hamburger will have higher fat content. Grass fed beef is usually in the 7% to 10% range.
Some of the fat in the ground beef gets removed when you cook it. Some fat beads up on the surface of the meat while drying. Blot off the fat from the meat with paper towels after cooking and a couple of times while it dries. Starting with low fat meat and blotting off what you can during cooking and drying will minimize any risk of the meat spoiling after it is dried.
For each pound of beef, sprinkle ½ cup of finely ground bread crumbs over the meat. Work the bread crumbs into the raw meat with your fingers. Make bread crumbs by dehydrating bread slices for two to three hours and then grinding the dried bread in a food processor.
Break the meat into small pieces and cook in a frying pan over medium high heat until lightly browned and fully cooked, stirring continuously. Remove from heat and squeeze between paper towels to remove moisture.
Spread small pieces of ground beef on dehydrator trays covered with Excalibur Paraflexx® sheets, parchment paper or the fruit leather inserts that go with your dehydrator. Using non-stick sheets keeps small pieces of dried beef from falling through the trays.
Dry at 145° for approximately six hours. Ground beef will be hard when dry.
Once or twice during the drying process, move the meat around and squeeze with a paper towel to remove oil. Wipe any oil off the non-stick sheets. Break any pieces of meat that are drying slower than the rest in half.
Note: If you are drying ground beef for long term storage over one year, omit the bread crumbs. The bread crumbs retain some of the fat from the meat. The dried beef will not rehydrate as well, but can be added to soups that simmer longer than a backpacking meal.
You’ll find the complete collection of recipes which include dehydrated meat in my book, Recipes for Adventure.
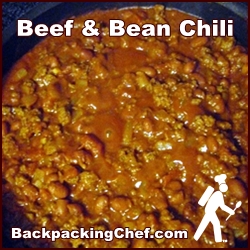
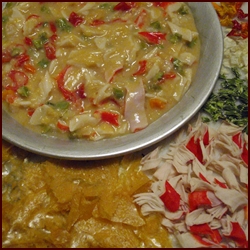
You can also dehydrate meat in a complete meal. See Dehydrating Meat in Chili.
People write to me often to say how much they enjoy eating it on the trail.
Dehydrating Meat: Sliced Ham
Choose lean precooked ham with fat content less than 10%. Deli ham sliced for sandwiches, about 1/16 of an inch thick, is good for dehydrating. Sliced roast beef or turkey may be dried also, but I mostly dry ham since roast beef is more expensive.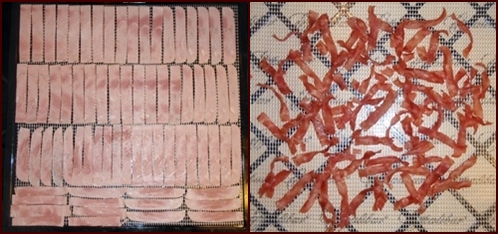
Blot off oil droplets that form on the surface of the meat with paper towels a couple of times while drying.
When the meat is completely dry, break the strips into smaller pieces for use in recipes.
Dehydrated ham remains a little chewy in meals, but I like the variety it adds to recipes such as Ham & Cheese Macaroni. Letting the meal boil for two minutes helps soften it up.
Dehydrating meat from the sea will add many menu options to your backpacking trips such as Shrimp & Grits and Tuna Casserole.
Dehydrating Shrimp
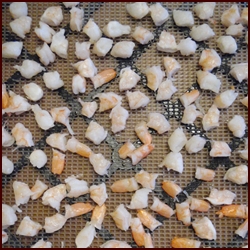
Thaw shrimp in refrigerator or ice cold water. Pinch off the tails and rinse.
Slice each shrimp into four or five pieces, arrange in a single layer on dehydrator tray, and dehydrate at 145° for approximately six hours until hard. There should be no moisture remaining when you cut a piece in half.
Dehydrating Tuna
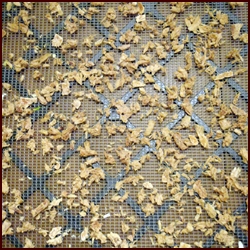
Drain off the water into your dog’s bowl. Break the tuna up into small pieces and spread out in a single layer on the dehydrator tray. Excalibur mesh sheets keep all but the tiniest crumbs from falling through, so I don't use non-stick sheets. But you certainly can use them.
Dehydrate at 145° for approximately six hours until crispy. Drying tuna will stink up your house.
Dehydrating Imitation Crab
Imitation crab meat usually comes refrigerated, not frozen, in a vacuum pack.
Pull the meat apart into smaller pieces and dry at 145° for approximately six hours until hard.
Dried imitation crab meat rehydrates well in meals.
No comments:
Post a Comment
Note: Only a member of this blog may post a comment.