Showing posts with label livestock. Show all posts
Showing posts with label livestock. Show all posts
Jun 16, 2015

Apr 21, 2015
Pig - Pen to Pan
About 2 weeks ago we decided we’d had ENOUGH.
Enough problems with our remaining yearling sow. She was eating all the feed, pushing the smaller pigs out of the way, and had been breaking out of and JUMPING over the fence. Yes, jumping. Over a 4 foot fence. Trying to eat ME. She was very confused; people eat pigs, not the other way around.
It all started when we started moving piglets out of the main piggie palace into the tiller tractors. We moved the mama sow up into the top pen, then closed up the gates to the top pen, and the “no mans land” pen in the middle. We then proceeded to move piglets out. As I was handing one of the little pigs over the fence, Taya and the twins were standing there waving their arms and shouting something. I couldn’t hear a thing over the squeals, but they were pointing behind me with panicked looks on their faces. I slung the piglet over the fence into the movable corral and looked behind me. Mama sow was trying to get over the lower fence to me, I guess to “save” her piglet. I got out of there. Fast.
Once things were calmed down a bit, they told me what all the shouting and waving was about. Apparently the ear-splitting squeals of the piglet got the 300 pound sow’s attention, and she cleared the fence “like a deer” according to the twins. They were trying to get me to hurry up before the sow got into the pen with me. I have NEVER seen, nor heard of a pig that could jump like that. This had me a little worried. She was a good mama, very protective, hadn’t laid on top of any of her piglets. We had hoped to keep her and raise another litter out of her, but a jumping pig was a problem. We decided to double the height of the fence, and see if she calmed down a bit. We added a second layer, reinforced with some additional wire and fencing and hoped for the best. But every time I came near her pen, she tried to go after me. We couldn’t keep her.
So, we waited for a somewhat cool day, and got ready. Since this would be for our family’s consumption, we would forgo a trip to the butcher, and do it ourselves. We have had plenty of practice, so we hoped we could have the slaughtering and quartering done by early afternoon before it got too warm. We started out nice and early; about 5:30. First step is always to sharpen the knives. I use 4 knives (and 1 cleaver) to do every part from start to finish. Sticking knife, skinning knife, butcher knife and boning knife. I use a little $5 sharpener from Lowes to keep a razor edge on all of the blades. A dull knife is a dangerous knife. As soon as the sun was up enough to see, we did the deed. I use a .22 LR to “stun” the pig, making sure to aim just off center of the “X” drawn from ear to eye. This book describes the “X”, and is an excellent guide for slaughter and butcher of just about any animal. I got it several years ago, and used it the very first time I ever butchered a pig; open on the hood of my truck as I went along – highly recommended.
After stunning, you have to “stick” the pig. Basically you need to open a large blood vessel, causing major blood loss. This; not the shot, is what actually kills the pig. The old timers used to stick them thru the side, into the heart. I’ve heard of people getting kicked or stabbed when attempting to stick them in the heart. I prefer the neck, it’s just as effective, and less risky.
After the shooting and sticking, we cut 2 small slits in the rear “hocks” of the pig, where the big tendon is, and looped a piece of rope thru each one. Tie a good tight, non-slipping knot in it, and loop them over whatever you’re going to hoist it up with. We borrowed our neighbor’s tractor that has a lift on it, as my tractor won’t start right now (never ending to-do list…). It was quite simple to lift the carcass up and over the fence, and haul it over to the slaughtering area. Now it was time for the first washdown.
Cleanliness is THE top priority when you’re processing meat. Any sort of contamination can spoil the flavor, and even worse – introduce bacteria and make everyone sick. Wash your hands often. I wear an apron once I get started cutting, and will usually wear nitrile gloves – I was out, so I made sure I kept my hands super clean.
After the first washdown, the next step is skinning. If you’ve ever processed a deer, or a goat, or a cow; this part will be pretty familiar to you, although pigs have a pretty good layer of fat just under the skin. You want to try and preserve as much of this as possible, to render down into lard. Skinning usually takes at least an hour; you start at the rear legs, cut all the way around, then make a V-shaped cut towards the center, then draw a line down the belly, all the way to the head. You only cut thru the skin, don’t cut into the meat. This is where the skinning knife comes in handy, it’s curved so you can work your way under the skin without cutting the meat.
 As you skin, you work your way from side to side, pulling the hide down over the carcass. You want to keep your knife absolutely razor sharp, as well as clean. If you get bristles (hair) into the meat you want to wash it off with clean water right away. It’s fairly easy to do a good job if you go slow. I learned long ago, if you hurry, you end up with bristles in the meat, and a big gash on your finger. Band-aids aren’t a bad idea to keep on hand if you’ve never done this before.
Once you’ve got the carcass skinned up to the spot where you “stuck” the pig, I remove the head. Take your big butcher knife, and cut thru the flesh all the way around, all the way to the spine. You can then either use a saw on the spine, or just twist it off. Both methods are equally as easy and effective. At this point I handed the skinning knife off to Ian, and had him skin the head. We always save the cheek meat for bacon, and the ears for the dog. You can use the entire head if you like, but we were on a tight schedule, so we only skinned enough of the head to cleanly remove the cheek meat.
The next part was to gut the carcass. It’s very much like gutting most other 4-legged animals. If it’s a male, you have to cut around, and remove any of the genitals, and then cut around the anus or “bung”. You want to be careful you don’t puncture any of the intestines, as this will contaminate the meat. Carefully open the belly, then when you have enough space to stick your fingers inside, put the back of your hand up against the innards, push them inward, and slide the knife between your palm, and the inside of the skin on the belly. You can then kind of “zip” your knife down, carefully and slowly without any risk of puncturing the entrails. Go all the way to the breastbone. Here is where I use the cleaver – to cut open the breastbone. You can gently chip it, or use something to “baton” the blade thru the bone. At this point, take a clean piece of string or baling twine, and tie it tightly around the anus, on the inside of the body. Have a barrel, or tarp or something ready to catch the entrails. You can then cut the rest of the way around the anus freeing it from the carcass. This will allow you to pull the entrails free; but be careful – there’s some good parts in there you don’t want to throw out. Liver, kidneys, pancreas are all edible. In fact I think they’re delicious. Be careful with the liver – don’t split the little green bile sac. Cut carefully around it and get rid of it. It’s extremely bitter. Put all the organ meats in a big bowl with some cool water, and set it aside for a bit. Once you have all the entrails removed, you can then cut thru the diaphram and expose the lungs and heart. Some folks like the lungs or “lights”; I’m not really a fan, so they go into the bucket. The heart is another really good organ meat. Add it to the bowl of cold water, and take it inside for processing. You can make scrapple, or whatever you like from these delicacies.
Cut out the windpipe, and any of the remaining large blood vessels, and now you’re ready to split the carcass into 2 pieces. I’ve tried several different methods for this, the way I’ve decided works the best for me is to use a reciprocating saw (like a sawzall).  In the past I’ve used a manual meat saw; until I almost removed the tip of my thumb with the saw. I’ve also attempted to use a cleaver to split the carcass. That was an exercise in futility. What I have worked out is this. You use your butcher knife to cut thru the fat, and the meat, directly along the spine. Cut right down to the bone, both on the back, and inside the carcass. You don’t want to use a saw on meat – it tears it up and makes a mess. Plus, by starting a line with the knife, you have a guideline to follow with the sawzall. If you get too far off to the side, you mess up the tenderloin. Put a large toothed blade in your saw, and start cutting. Do your best to stay on the line you made with your knife. When you’re done you should have 2 halves, each swinging from their own piece of rope.
It’s time for another good washdown. You’re going to have a lot of bits of bone from the cutting that you want to make sure and get rid of. I take my time and do a good job, I really hate enjoying a nice pork chop and getting a tiny bit of bone in there. Use your fingers to rub the bone bits loose, or use a clean brush if you have one. Flush it out with plenty of water.
The next part is going to take some muscle power, so have a couple of strong backs around. Make sure you have a clean shirt/apron, whatever. Grab a hold of the half that’s hanging, and have someone else cut the rope that is holding it up. DON’T DROP IT. You’re going to have 100 pounds or more come down very quickly, so be ready.
The next step in the process is quartering. This is an important step to learn if you’re going to make pretty cuts of pork. Until I watched the farmstead meatsmith video called On The Anatomy of Thrift, I was horrible at quartering a pig. I had some really awful looking cuts of meat. They tasted fine, they just looked, well… butchered. I usually watch the video each and every time I butcher – I pick up something new each time, plus I just enjoy watching it. We have a nice stainless steel table that we use to cut the pig into quarters. You can use any flat surface, just so long as it’s sturdy and clean. After quartering the first half, and getting the quarters into coolers with ice, do the second half. There – now the race against the clock is not so urgent. You can move inside at this point, you don’t have to worry so much about the heat.
 While all of the slaughtering is going on outside, the ladies are inside preparing for us to bring in the quarters. The kitchen is set up into different stations – boning, grinding, mixing, packaging. Recipes are written up on the chalkboard.
 Everyone settles into their job, and the work goes very quickly. We make a lot of ground pork and sausage from each pig. Normally we’ll grind 1 ham and 1 shoulder, along with the trim from the cuts.

While the process gets started inside, there’s still some cleanup to do outside. The hide and the entrails need to be taken care of. We normally bury them deep in the compost pile. They’ll break down fairly quickly, and won’t smell, as long as they’re buried deep enough. The table and tractor needs a good washing. The knives need cleaning and another sharpening. Then it’s time to move inside and help with the butchery.

Bone bucket
I’m no expert butcher, but I can make fairly recognizable cuts of meat now. Some of my first attempts were packages labeled “Roast??” and “I think these are chops”, and the nice generic “Meat”. You can tell my chops are chops, tenderloins, ribs, and the best part……. BACON. More on that later. We use every scrap of meat, save the bones for stock, and try not to waste anything. Lard gets bagged up and frozen, to be rendered later. We’ve gotten very efficient at breaking down a pig, and this time set a record – everything in the freezer in about 4 hours.

Lovely lard
One of the last steps in putting up a pig, is to make the bacon. Taya mixes up the cure, once I let her know how much belly and cheek meat there is. Then I slather the cure on the pieces of meat, and tuck it away in cold storage for the next week. Once the cure has had 7 days to work it’s magic, it’s time to soak the bacon.  This equalizes the salt levels, and washes off the excess cure. It gets a soak in clean water for 24 hours. Then another 24 hours drying time to allow a pellicle to form, so that the smoke will take. Then the fire is lit, and the smoking process begins.
Depending on how smokey you like your bacon, you can smoke it from 30 minutes to overnight. We like it somewhere in between there. Usually 2 hours is about perfect. You want a very low, smokey fire, otherwise you’ll cook your bacon. It’s still edible, but it’s kinda tough.
After smoking, there’s the all-important sampling step. Before you package it up to put into the freezer, of course you have to try it. Since there’s always some ugly pieces that need to be trimmed before packing, it’s your duty to cut them up and deposit them in a hot cast iron skillet. Then of course they should promptly go straight into your mouth. Painful, but delicious. Now it’s safe to pack the bacon up into bags and freeze it.
There you have it. From the pen, to the pan. One pig. Yes, she was a good pig; a great mama. We’re a little sad that we couldn’t keep her for another year to allow her to have another littler of piglets, but she was just too aggressive, and aggressive animals aren’t gonna be allowed to stay around here. We’re hopeful that one of her gilts will be as good a mother as she was, but not be so aggressive. I hope you’ve enjoyed taking this little journey with us, and you’ve learned something from it.
Until next time…..
Jan 9, 2015
The Basics of Raising Your Own Chickens

As Spring approaches – many begin to think about the possibility of raising their own little flock of chickens. Backyard chickens have become popular in the last decade – and with good reason – not only can they provide your family with great tasting eggs – they can also become a great source of free fertilizer for your garden – and a great way to control insects! (see: The benefits of raising your own chickens)

The original coop at the farm – made from pallets and shipping crate wood
We began raising our first chickens back in early 2011 – and it has truly been by far one of the most rewarding experiences we have ever had at the farm. We started out with little knowledge other than what we had read in books and researched on-line – but before we knew it, we had a coop, nine full-grown hens and about four to five dozen eggs a week!
The process of raising your own chickens is quite simple – and really comes down to the ability to provide the basic necessities of life – food, water, shelter – and a little space to keep them happy.
The Baby Chick Process:
The entire process starts with the purchase of baby chicks – many local farm and feed stores will carry a supply each spring – or you can purchase through the mail from a reputable supplier.

Baby chicks chowing down
Either way – your chicks will come to you as little 1 to 2 day old balls of fur – and for the first 8 weeks of their life – you will need to keep them in brooder until they are ready to join the “real world”. We made our own brooder for free from some old shipping crates – but you can also something on hand – such as a galvanized stock tank or large plastic crate – both of which can be excellent temporary brooders. You can also of course purchase ready-made brooders at your local farm store. As a note – cardboard boxes are not a good choice – not only are they a fire hazard when a heat lamp is used – but they simply do not hold up well with the soiled bedding material created by the baby chicks.
Once you have your brooder on hand – you can fill it with pine shavings to serves as a bedding for the chicks. Sawdust and straw are not good choices for baby chicks – as they can get stuck to their backsides and create all kinds of issues for the chicks.

Our home made brooder – protected by our lab
We use a heat lamp attached to the brooder to keep the temperature around 90 to 95 degrees during the baby chick’s first 5 to 7 days. With no feathers and just a little fuzz to protect them at birth, its important to provide them the warmth their little bodies need to survive. As they continue to grow – we reduce the temperature by about 5 degrees each week until they feather out and can provide their own body heat – changing pine shaving bedding as needed to keep it as clean as possible.
It is amazing to watch how quickly they learn to use the water and food feeders – and by the end of the first week, they are already trying to learn the art of perching.
At about 8 weeks, they will be ready to move to their permanent home. For more on raising chicks – see : Raising chicks to become chickens
Providing a Permanent Home:
When we first started out – we built our first little coop for nearly free from pallets(see: Building our first coop) - but have since expanded the flock and built a more permanent structure at the farm.

Our new coop – completed in May of 2013
There are numerous chicken coops available commercially – but again – you simply need to provide them with secure and safe housing – and a little area to roam about and enjoy the great outdoors. Chickens do have natural predators such as racoon, coyote and foxes – so you will need to have a secure coop for their protection.
As for what room do they need – most chicken “experts” will tell you to use 4 square feet of floor space per chicken in the coop – and about 10 square feet per chicken in the run a good rule of thumb. Using that formula – you can easily keep 4 to 6 chickens in a 6 x 4 coop – and 6′ x 10′ run – not a lot of space to enjoy fresh eggs and the companionship of a few backyard chickens! In addition to a big outdoor protected run for our chickens – we also like to let them free range around the farm. (see: Building a safe and secure coop for our chickens)
Depending on the variety you choose – your chicks will usually begin to lay their first eggs anywhere from week 16 to 20

You can’t beat fresh eggs – Check out the size of the middle one!
The first few eggs are usually on the small side – but they get the hang of it pretty quick and start laying nice sized eggs within a week or two of their first egg. We raise mainly Golden Comets and Leghorns, and they are prolific producers – laying an egg about 5 to 6 days each week.
Ans speaking of those eggs – YES – there is a huge difference from those store-bought eggs! With one simple crack of a “home-raised” egg – its easy to see the difference in yolk and color – not to mention the great taste! Whenever we give some of our fresh eggs to friends and family – they marvel at how our eggs barely fit in the cartons – and then always tell us later they couldn’t believe the difference in taste.
The Added Benefits:
In addition to those great tasting eggs – chickens provide valuable manure that can be all of the natural fertilizer your garden will ever need!

The chickens also provide valuable and free fertilizer to help our garden grow strong each season
It is also a key ingredient to our composting pile. Chicken manure is high in nitrogen, and when mixed with carbon materials such as shredded leaves, coffee grounds, straw, grass and vegetable scraps – it helps to heat compost piles quickly – and the end result is rich organic matter that can provide valuable nutrients to grow great-tasting vegetables each year.
Chickens also provide crucial pest control services – devouring hundreds of bugs each and every day as they roam about.
Maintaining your Flock:
We spend on average 5 minutes a day to fill up the feeder – re-supply the water, and collect the day’s eggs. And once every month – we will take and extra 10 minutes to clean out the straw in the coop and add to the compost bins – that’s it!
Happy Chicken Farming! – Jim and Mary
Jan 8, 2015
ADVENTURES IN RAISING DUCKS

Our duck activities have garnered a lot of requests for a full show on just ducks. So today I will do my best. I have been reluctant to do so for a few reasons. The first is ducks are a new thing to me. I grew up caring at least at times for chickens and geese. I know their requirements well.
While I observed lots of semi wild muscovies in Florida, I was not responsible for their care other than feeding them surplus fishing bait. As of right now my direct experience in duck husbandry is about 8 months long. This spring we purchased our little ducks, we lost some but now we have 25 happy adults. I have had good results but credit the ducks more than myself with that.
Leading me to the second reason, there just isn’t much to it unless you go out of your way to create work for yourself. Rain and cold can kill a chicken, it makes a duck happy. Ducks travel in groups, if you get one headed the right direction, pretty much everyone follows. They forage, they eat, they poop, they quack and they lay eggs. Unless you are breeding show quality birds or something there isn’t a lot to it. At least that is how it feels at times.
Join Me Today to Discuss…
- Why the duck is much easier to care for than a chicken
- Loves cold
- Loves rain
- Easy to fence
- Light on land
- Herding is possible
- Hunts as a pack
- Cool manure
- Creature of habit and routine
- The not so great side of ducks
- Messy
- Single minded stubborness
- Noisy
- Creature of habit and routine
- Duck breeds I am working with
- Cayugas
- Hybrid Layers
- Rouens
- Runners (various)
- Khaki Campbell
- Swedish (may be?)
- Muscovy
- Best All Around Breeds (my opinion based on research)
- Meat – Pekins or Grimaud Hybrid Pekin – Jumbo Pekin
- Eggs – Hybrid 300 Layers (gold or white)
- Self Propagating Dual Purpose – Muscovy
- Dual Purpose – Buff (aka Buff Orpington)
- Duck eggs and why they rock
- Ducks are born with 1500 ovum vs. the 1000 of a chicken
- Ducks are good layers for 3-4 seasons
- 6x the Vitamin D, 2x the Vitamin A, of chickens
- 2x the cholesterol in duck eggs vs chicken eggs (good cholesterol)
- Higher fat and energy content (good fat)
- Thick, viscus yolks (beautiful over easy/medium)
- Better for baking if that is your thing
- Less likely to break yolks, or accidentally crack one
- The basics of raising and managing ducks
- “Experts say space the same as chickens
- 4 sf per duck in “coop” 10 sf per duck in “yard”
- Ducks don’t “perch” except for muscovies (sometimes)
- Fencing can be 3 feet high except for muscovies (sometimes)
- I don’t use laying boxes because the ducks don’t seem to care
- Generally most eggs are laid by 730ish am
- Provide water, they shit it up FAST
- A ducks personality tends to be the sum of its flock personality
- Hatching young ducks
- If you can get a mom to do it, let her do it
- Incubation is the same as chickens, it just takes longer
- Store eggs for up to 10 days, then start all of them together
- Day 1-25 99.5 turn 7 times a day, Day 26-28 98.5 no turning
- Day 1-33 99.5 turn 7 times a day, Day 33-35 98.5 no turning (muscovy)
- Brooding young ducks
- Expect to brood for 3-5 weeks depending on season
- Provide heat on one end of brooder
- Spend a lot of time with them if you want them “tame”
- Feed them chick starter
- They can go into a “tractor” in good weather as early as 2 weeks
- Do not introduce them to the main flock until they are at least 60% grown
- Develop a drain system for water
- No “bathing water” until 2 weeks
- They MUST be able to dunk their heads in water
- Some will die, accept it
- Final thoughts
- If you incubate get a good incubator
- Beware of “Tractor Supply Disease”
- eFowl and Metzer are great places to order
- Just do it, it isn’t hard
Jan 4, 2015
How To Keep Chickens Laying Through Winter
I love my chickens. They are the most easy to care for and more rewarding of all farm animals, in my opinion. However, I am also a pragmatist. My chickens are here to DO something, and that something is lay eggs. These are not pets; they are food producers that I also find beautiful and entertaining. I provide them with a clean living environment, free-ranging fun, food, and protection. In turn, they provide me with eggs. When they stop laying eggs, my family eats the chicken. Some chicken owners may wince at this outlook, but my family lives on a shoestring, and we can’t afford to feed animals that aren’t giving something back. Our dog provides protection, alerts us to strangers and danger, and hunts with my husband while also being a great companion. Our sheep provide lambs for food, and they eat down weeds and pasture. Even our cats keep the mice population down. I strive to give each animal a happy life, but to me it must also be a useful life.
As you can imagine, I want to keep my hens laying throughout the winter. This can be a problem as the temperature drops and there is less light. The old proverb “An ounce of prevention is worth a pound of cure” is so true when it comes to raising animals. Here are the challenges you must combat in the winter and how to counteract them.
Shelter
Most animals need shelter in winter, and chickens are no exception. In fact, if you want eggs it’s best to provide a shelter that is well sealed against the elements. Not only will this keep your hens safe from colder temperatures and predators, but it will also give them a place to lay your eggs that you can find and easily access.
My Solution: Shelter doesn’t have to be fancy for chickens to be happy. If you don’t already have a chicken coop, an old truck cap is enough in a pinch. You could also use straw bales with a sheet of plywood over it. It simply needs to be draft free, keep out the rain and snow, and be fairly easy for you to get into to check for eggs. There are quite a lot of ideas for homemade, do-it-yourself chicken coops on the Internet and youtube.com. It is also good to give the chickens a dedicated laying box that is secure from predators. Some people build boxes, while others use old milk crates or other existing boxes. The key is for the chickens to be able to easily get inside the laying box, yet have some sides for a bit of privacy, and hold a bit of dry straw or wood chips to provide a soft spot for egg laying/dropping.
Food
Many homesteaders believe in letting chickens forage for themselves, while not providing food for them. This may work okay in the summer when food is plentiful, but if you want eggs in winter you will need to provide feed to your chickens. Also, it is pretty cruel to not feed your chickens in winter when there is so little to forage for. Often, in the winter the ground is frozen, making it hard for them to scratch beneath the surface to locate any bugs or seeds.
My Solution: Buying bags of layer pellet feed is the best option. Also, providing corn or scratch will help your chickens maintain healthy condition through the cold with its nice high-protein content. The more energy your chickens expend on keeping warm, the less eggs they will lay, as that energy is going to come from either their body or their food.
Breed Selection
Some chickens are better suited to certain climates than others. In fact there are some chicken breeds that will literally die if they go through a typical northern winter. So breed selection is very important to your winter egg production.
My Solution: If you live where it gets cold and dark in winter, then choose chickens that are known to lay well in winter. My favorites are Buff Orpingtons, Black Australorps, and Araucanas, because we live in a very cold winter area. A good place to compare different breeds of chicken is the Murray McMurray Hatchery website. In their descriptions of the different breeds they specifically note which chickens are good at winter laying.
Light
This, in fact, is the most important and least understood reason that chickens stop laying. Chickens need a certain amount of daylight to keep laying. When it falls off during the short winter hours of daylight, their bodies tell them to stop laying until spring’s extended sun hours arrive.
My Solution: Put a light in your chicken coop and leave it on. You can shut if off at night, if you want, but we don’t; the light additionally adds heat, and the chickens do fine.
Heat
Chickens need heat to produce eggs. If they are too cold, they will stop laying because most of the food they eat goes to heat production rather than toward egg production.
My Solution: The easiest way to heat your coop is have a heat lamp hanging from the roof inside. These can be picked up at any feed store, or even Walmart, for less than $30.00. You can choose from white or red bulbs. The bonus to red is that it helps to prevent chickens from picking at each other. An additional way to keep heat inside the coop and cold outside is to seal any holes and drafts; this will help immensely.
Litter
What you use for chicken litter will depend on your personal preferences. I like pine wood shavings because they mix well with the manure and absorb and dry it while also adding a nice scent. Having a layer of dry litter is important to laying production because if you are wet you are cold. Also chicken manure is high in ammonia and lets off the stuff in large amounts. This can irritate your chickens’ lungs. Your chickens will be spending much more time in their coop during cold weather so keeping their coop dry and their air clean will help with egg production. It is important to remove dirty litter as well. If an egg gets broken into the litter, it is important to remove the broken egg, dirty litter, and to clean so that there is no remaining egg contents. Otherwise, the chickens may eat it and develop a taste for their own eggs.
My Solution: Every week, I spread an inch or more of litter in their coop. You should adjust the frequency and amount applied, as needed. I also replace litter as it gets dirty and try to keep the area clear of any excrement. This helps me have clean eggs that don’t require washing. (Leaving the bloom on the eggshell helps seal the pores and make the egg stay fresh longer.)
Supplements
Egg laying chickens use alot of nutrients to produce an egg every day. Providing a balanced diet is easy if you use layer pellets.
My Solution: Provide crushed oyster shells for added calcium, even if you’re using layer pellets. Chickens will take what they need. Providing grit is also a good idea, since the dirt and gravel may be covered with snow, and if you are feeding corn or scratch, they need the grit to grind the grains.
Cod Liver Oil is an essential supplement that I have found highly effective to keeping my chickens laying. The reason why cod liver oil is important is that not only does it provide omega oils, it also is a great provider of vitamin D. Now the interesting thing about vitamin D is that it is produced by sunshine. Human bodies cannot produce it on its own. This is why mothers, a hundred years ago, made their children take a spoonful of cod liver oil every day in the winter. Are vitamin D levels an influence on egg production, cuing the chicken’s brain back into laying? I don’t know, but it works every time I use it.
How to Use Cod Liver Oil: I simply buy a big bottle of the cheaper Cod Liver liquid jells and cut them open. Then I squirt them into the water of my chickens. That way they get the same dose approximately. I figure one pill per chicken for a few days until egg production starts up again. Then I give them the same dose a few times a week. Be sure to use this in conjunction with a light in your coop.
Green Stuff
Chickens loves fresh green stuff like lettuces, grass, and weeds. You can sprout your own greens at home super easy. I love my Easy Sprouter, which you can find on amazon.com. Additionally, you can give them leftover salad that has wilted. Another option is to ask your local grocer for produce that they are going to throw out. Your chickens will bless you for the treats. Just avoid onions, garlic, cabbage, and any of the brassica vegetables (broccoli, cabbage, kale, and brussels sprouts), as they can give a bad taste to your eggs.
I hope this helps other chicken raisers to keep their hens healthy and laying all winter.
Dec 7, 2014
Backyard Livestock
If you have been to the grocery store lately you will have noticed that prices for everything are still rising will no end in sight. According to the latest numbers released by the feds, last month’s payroll numbers did rise but I can tell you it didn’t around my place. The prices we all pay for the necessities are continuing to rise and there is no hope in sight. The recession is still continuing for most of us, but the recovery is progressing at a snail’s pace. There are still segments of the US population at are still maintaining a 20% or higher unemployment rate. The job creation rate is rising for some specialized skills and for lower paying jobs.
Does this information concern you? It should. There should be many questions going through your head right now. One of the many questions you should be asking yourself is how are you going to continue to put quality food on your table and ensure that your family is fed. There are several different things you can do to help your situation and in the long run possibly bring in some extra cash in the long run. There are also some other benefits, but we’ll go into those later.
Backyard livestock is one answer is one answer to this dilemma. There are several animals that can provide your family with the needed nutrition and give your wallet a much needed break. Now a word of caution before you embark on this endeavor. If you are a city dweller, be sure and check your local zoning ordinances before you put any money towards building your backyard herd. Also, remember animals always come with responsibilities, don’t start down this road unless you are prepared to dedicate the number of hours and resources to care of these animals.
There are several different animals you can choose from to supplement your store bought meat sources. Let look at a few.
Rabbits. Rabbits are an excellent source of protein and can be prepared in many of the same ways as chicken. Rabbit meat is leaner than most meats that you can obtain in the supermarket. These animals are quite, relatively clean and productive little creatures. As long as you keep their hutches cleaned regular they are basically odor free. Besides the meat, they can also provide fur.

Some down sides to raising rabbits are the predators love them. Make sure that you have a strong hutch and fences for your rabbits. Both the hutch and fences will have to be able to keep the predators out. You may want to keep your hutches in a garage or shed. Rabbits can also be affected by diseases. If the rabbits appear sick, seek veterinarian assistance as soon as possible.

Rabbits in a summer cage.
If you are going to spend any time away from your rabbits, you should have a trusted friend or family member look after your hutch. Your rabbits will have to have water and food while you are gone. Whoever gets the job of looking after your rabbits during your absence, make sure they can be trusted to carry out all the duties that the rabbit care will require.
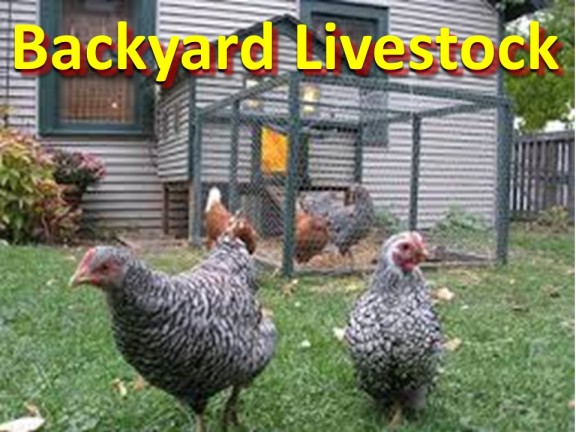
Chickens. Undoubtedly the most popular backyard livestock is chickens. There are a lot of advantages to raising chickens. They are a great source of protein, extra cash and can believe it or not can also be a great source entertainment on those long summer evenings. Chickens can provide you and your family with fresh eggs, meat and even manure for your garden. Several chickens can be kept in a small area and will eat about anything.
 Chickens have the same draw backs as rabbits, but these can easily be overcome. Again, remember to check local zone regulations and if needed homeowner association rules to be sure that you can keep chickens in your area. Some areas will allow you to keep chickens but not roosters.

Your chickens will have to be kept in a secure coop. They will also need a fenced area where they can safely scratch, peck and get some bugs. You may even want to fence or net the top of the fenced area. This will help keep the chickens in and predators out. There are several good sites out there that can tell you how to build your coop and nesting boxes.

Miniature Goats. If you’re lucky enough to have a large enough area, miniature goats can be another great alternative to having to buy meat and milk from the store. Unlike rabbits or chickens, goats, even miniature goats will require a large enough fenced area to move and exercise in. A pair of miniature goats require about 50 square feet of area. The more goats you have the more area you will need. The fence should be a woven metal fence if possible. Most goats can be destructive and will chew a wooden fence. Goats should be given plenty of items to play with or keep them occupied and even items for them to stand on top of to satisfy their urge to climb.

Miniature goats can provide a source of both meat and milk. Milking goats can provide you with about a half of gallon or more milk a day. Milking goats are required to be milked twice a day for a 10 month period. Goat’s milk can be used for a lot of things, including drinking milk, soap, candles and other items used daily around the house.
 Goats, require a shelter that will keep them dry. In the winter, the shelter should allow the goats to move in and out, but also keep the wind out. They will need plenty of straw for bedding and this bedding will need to be changed often. By changing the straw and cleaning the goat’s area they will produce little odor and may provide you with extra income.

Other Backyard Critters
Bees. Every gardener, whether they are hardcore or a hobbyist should strongly consider hosting a bee hive. No matter if you have fruit trees or a vegetable garden a bee hive will not only keep your fruits and vegetables pollinated but also the entire neighborhoods.
 A lot of times you can strike up a deal with a bee keeper to share some of the honey with you. If you find you like having the bees around, you can study up and become a bee keeper too!
Fish. Aquaponics has become very popular in recent times. Fish can provide you with a meat source and an alternate source of fertilizer for your garden. They can be fed worms from your compost pile and even certain vegetable scraps. Again, the fish will provide you with a source of fertilizer that can be used in your garden. The water from your aquaponic system can be directed to your garden to provide an alternate water source.
 You and your neighbors grass clippings can be used as a food source for rabbits, chickens and the goats. If you look around your neighborhood long enough, you should be able to find other food sources for your livestock. Remember, you are raising these animals as livestock. They can also be traded and sold to provide funding for other food and needed services for the other animals.
As with any other project, you must educate yourself before trying to raise livestock, big or small. It’s not easy raising any animal, but it can be rewarding both spiritually and financially. These animals can provide you and your family with another way to prepare you and your love ones for the hard times to come.
Subscribe to:
Posts (Atom)